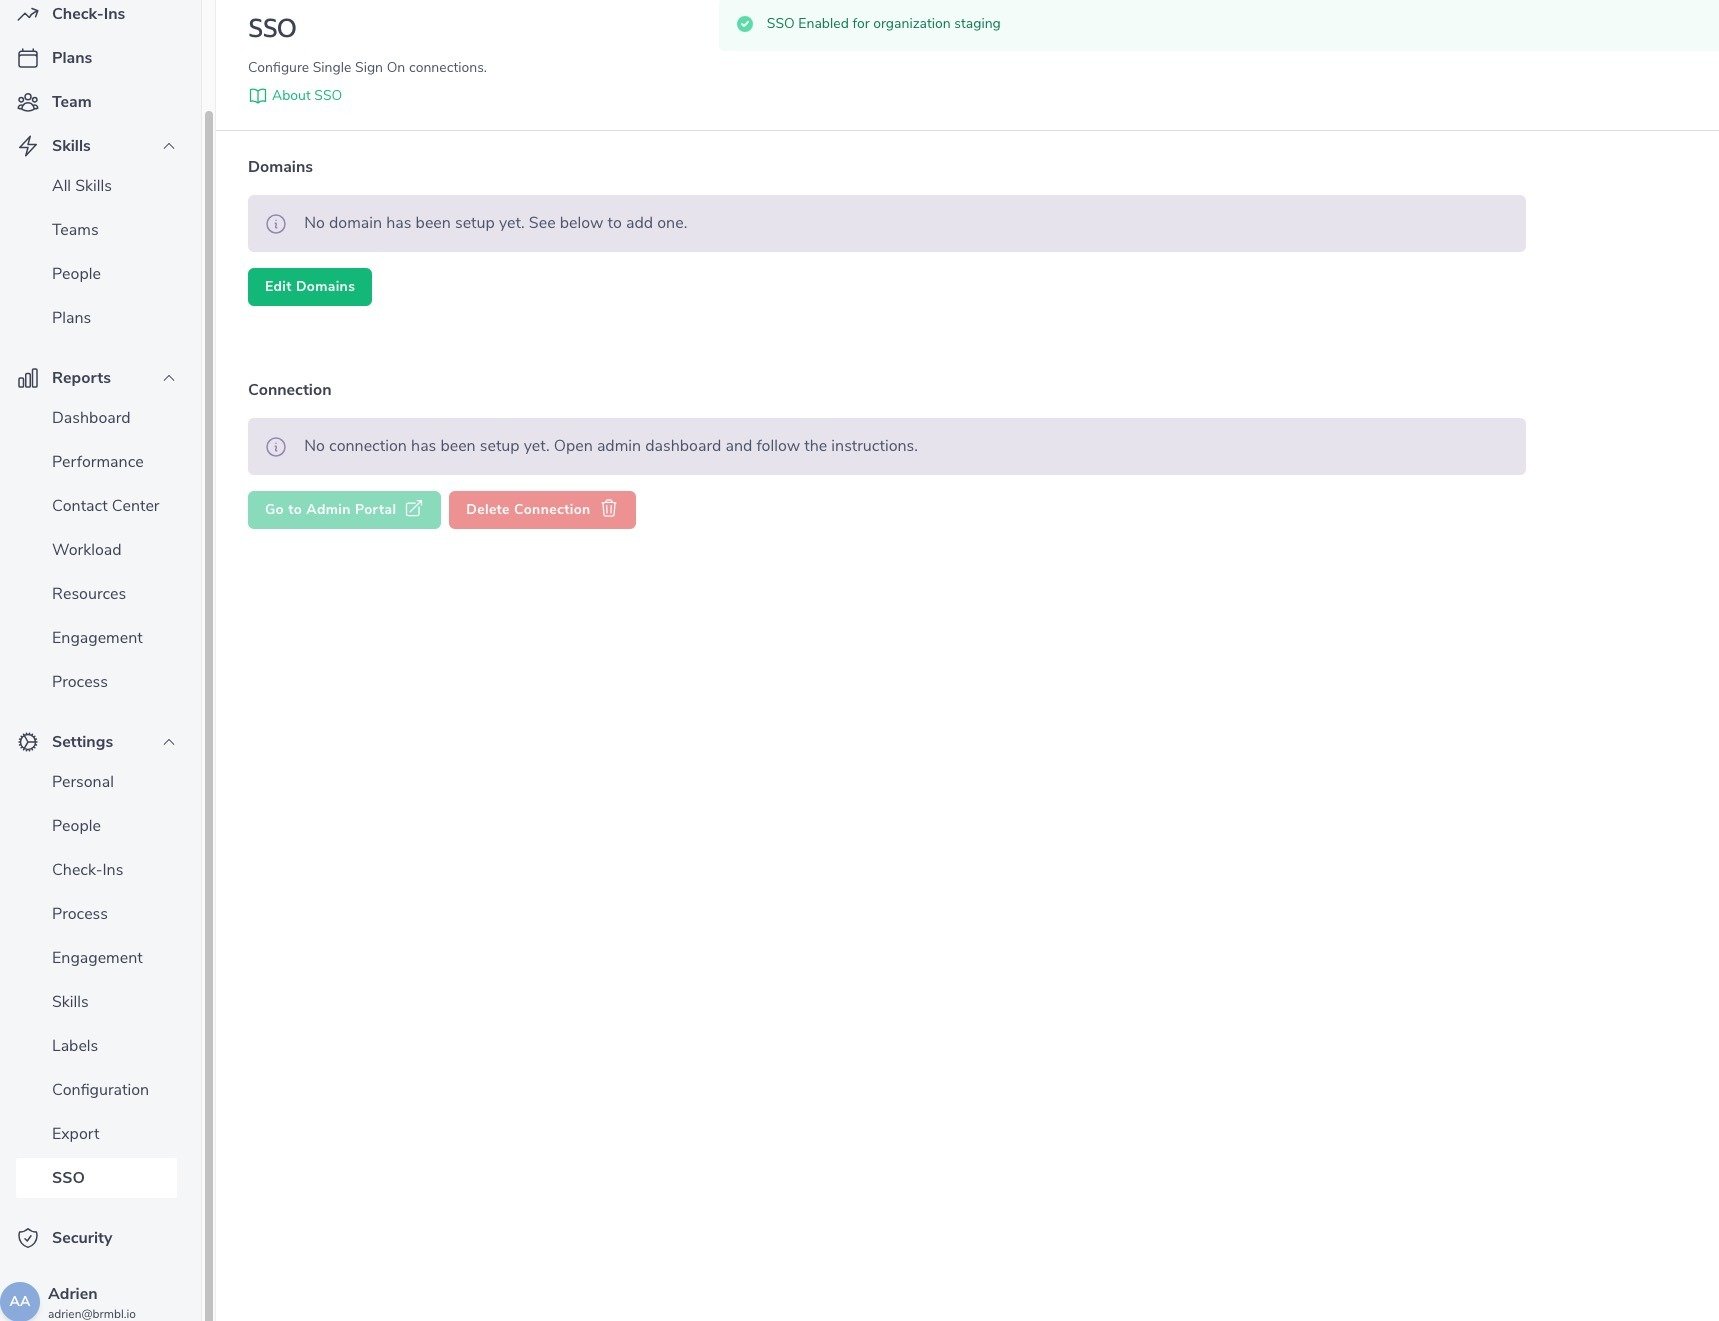
As an account owner, click on "SSO" in the "Settings" section of the left side menu.
You should see a big "Enable SSO" button. Click it to create the initial setup.
You can now see empty lists of domains and connections:
Click "Edit Domains". It opens a modal form to add one or several domains for your organization.
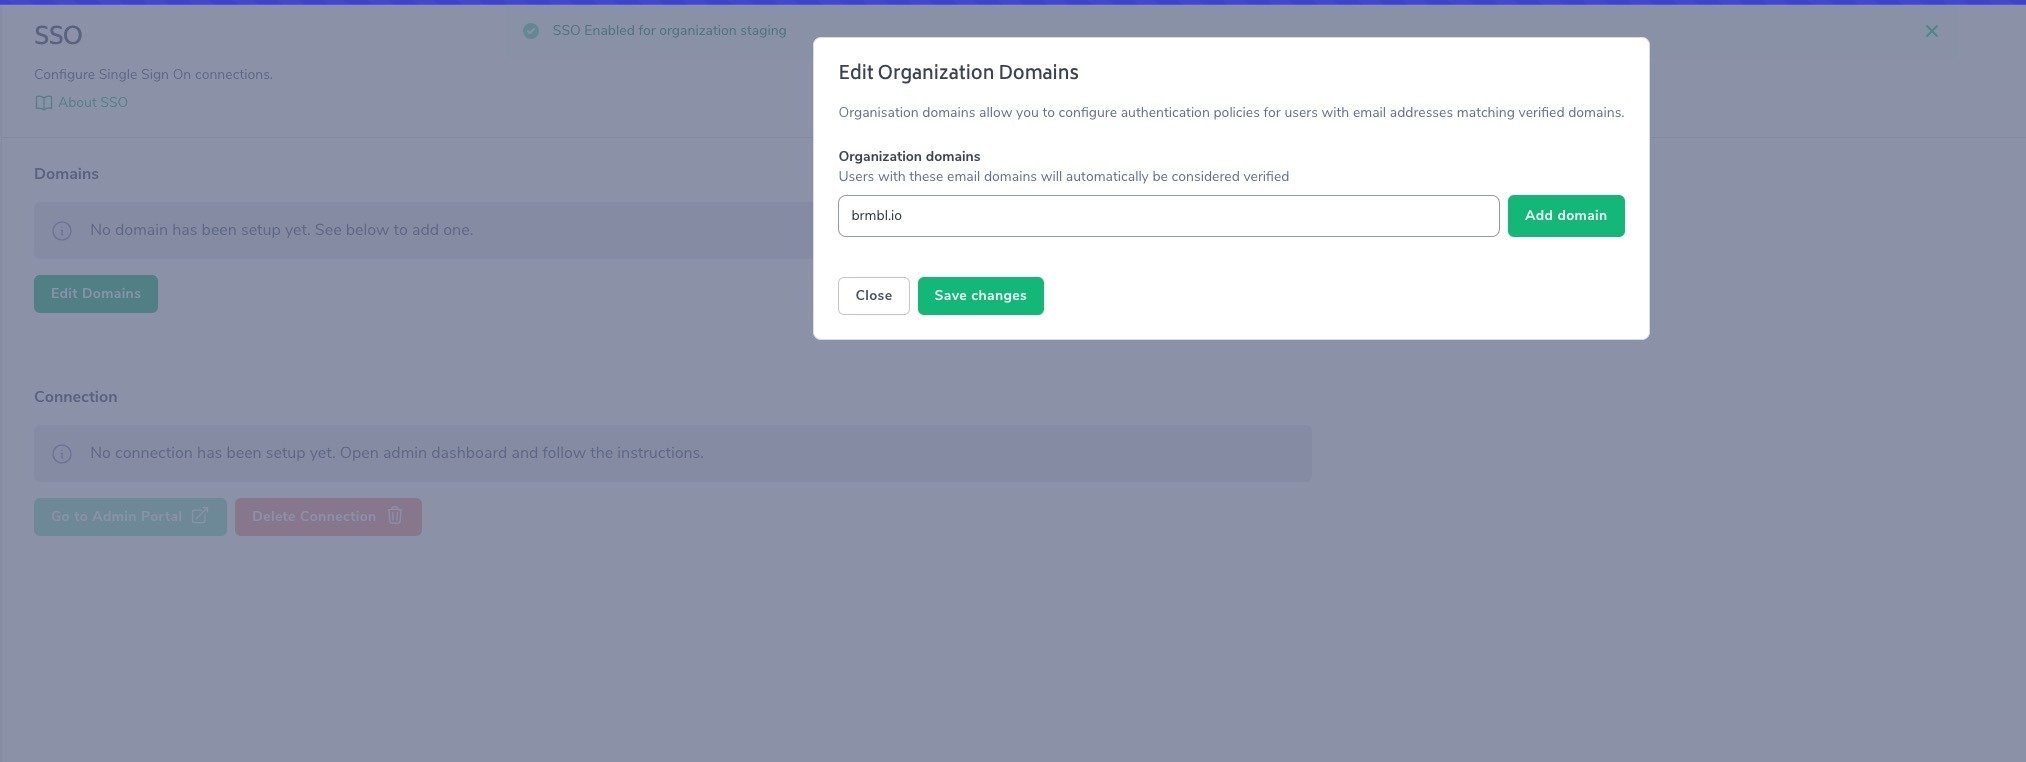
Type a domain name, then click "Add domain" to fill the list. Then "Save Changes".
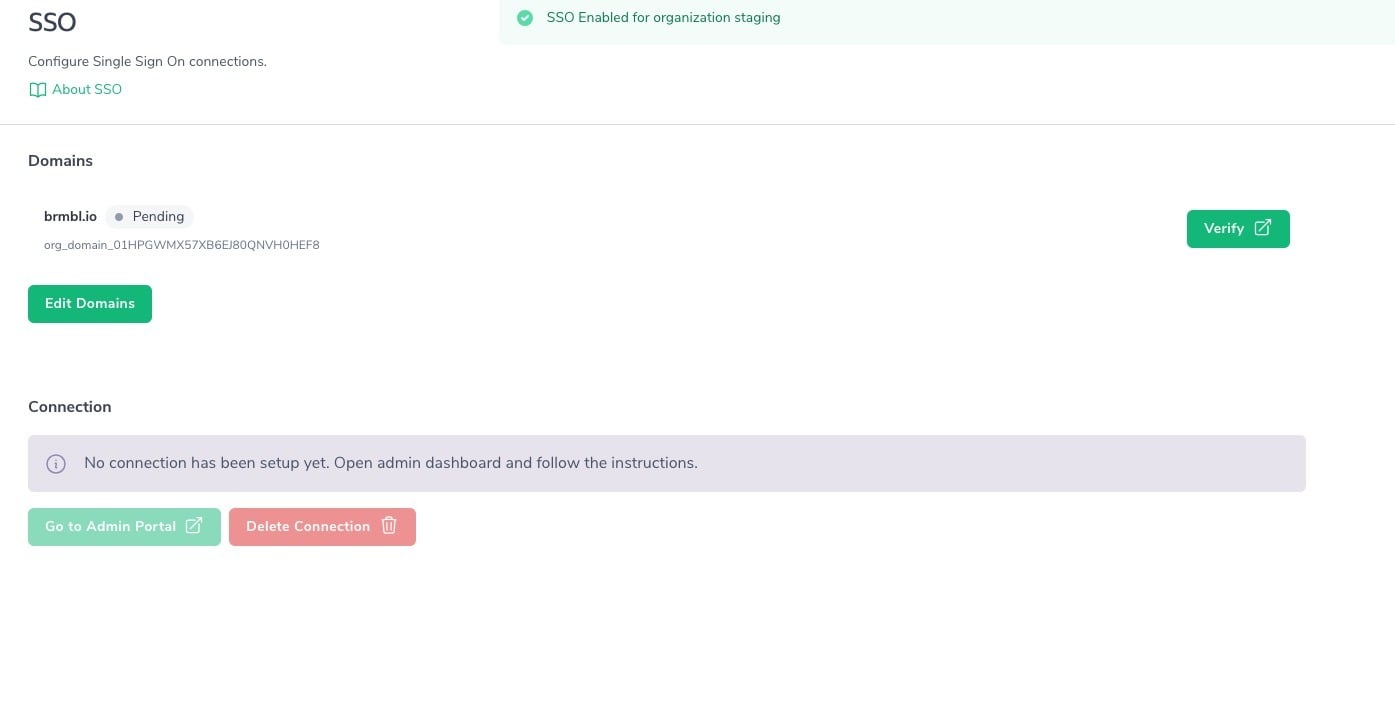
Click "Verify" for each domain you created. It will open an assistant giving you the TXT record to be added to your DNS configuration for the typed domain name. Once it successfully checks that your setup is correct, you can come back to Bramble's SSO settings page.
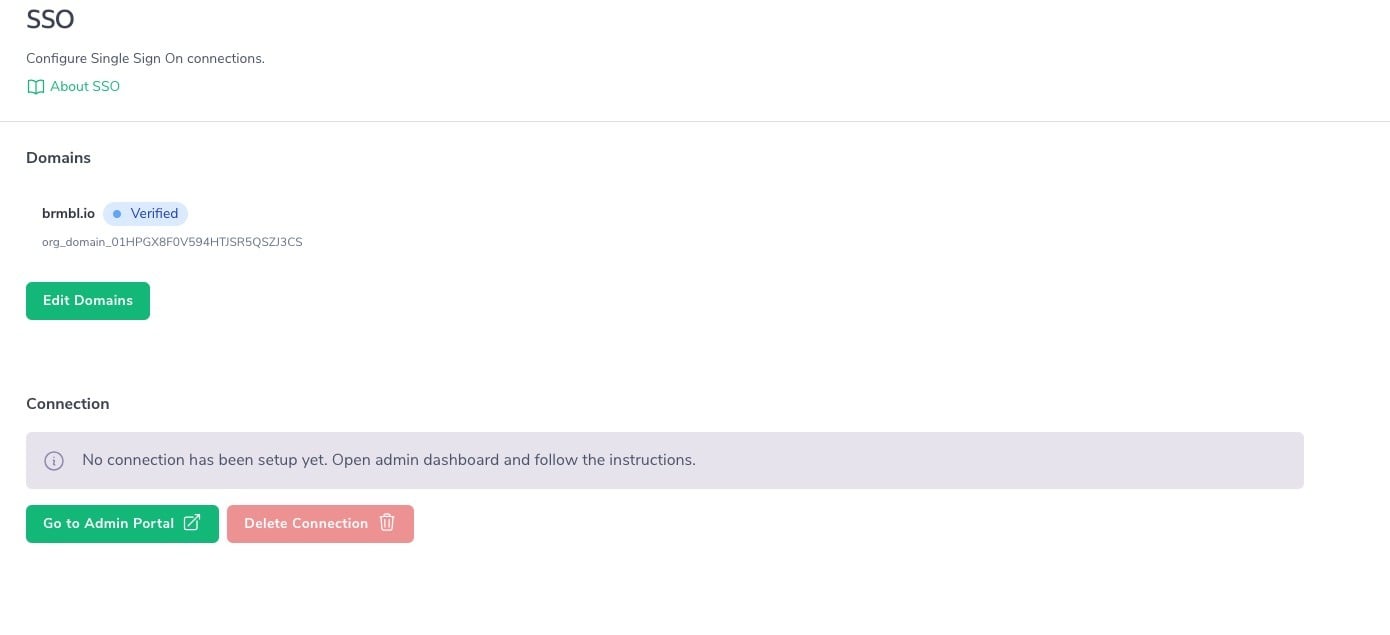
The newly checked domains will have a "Verified" status.
Click "Go to Admin Portal" under the "Connection" section.
This will open an assistant walking you through the configuration to connect your Identity Provider (IdP) with WorkOS, our service provider.
Once the connection is setup, your users can log into Bramble using their work email, which will take them to your IdP's login screen and redirect them back to Bramble once the credentials have been successfully checked.