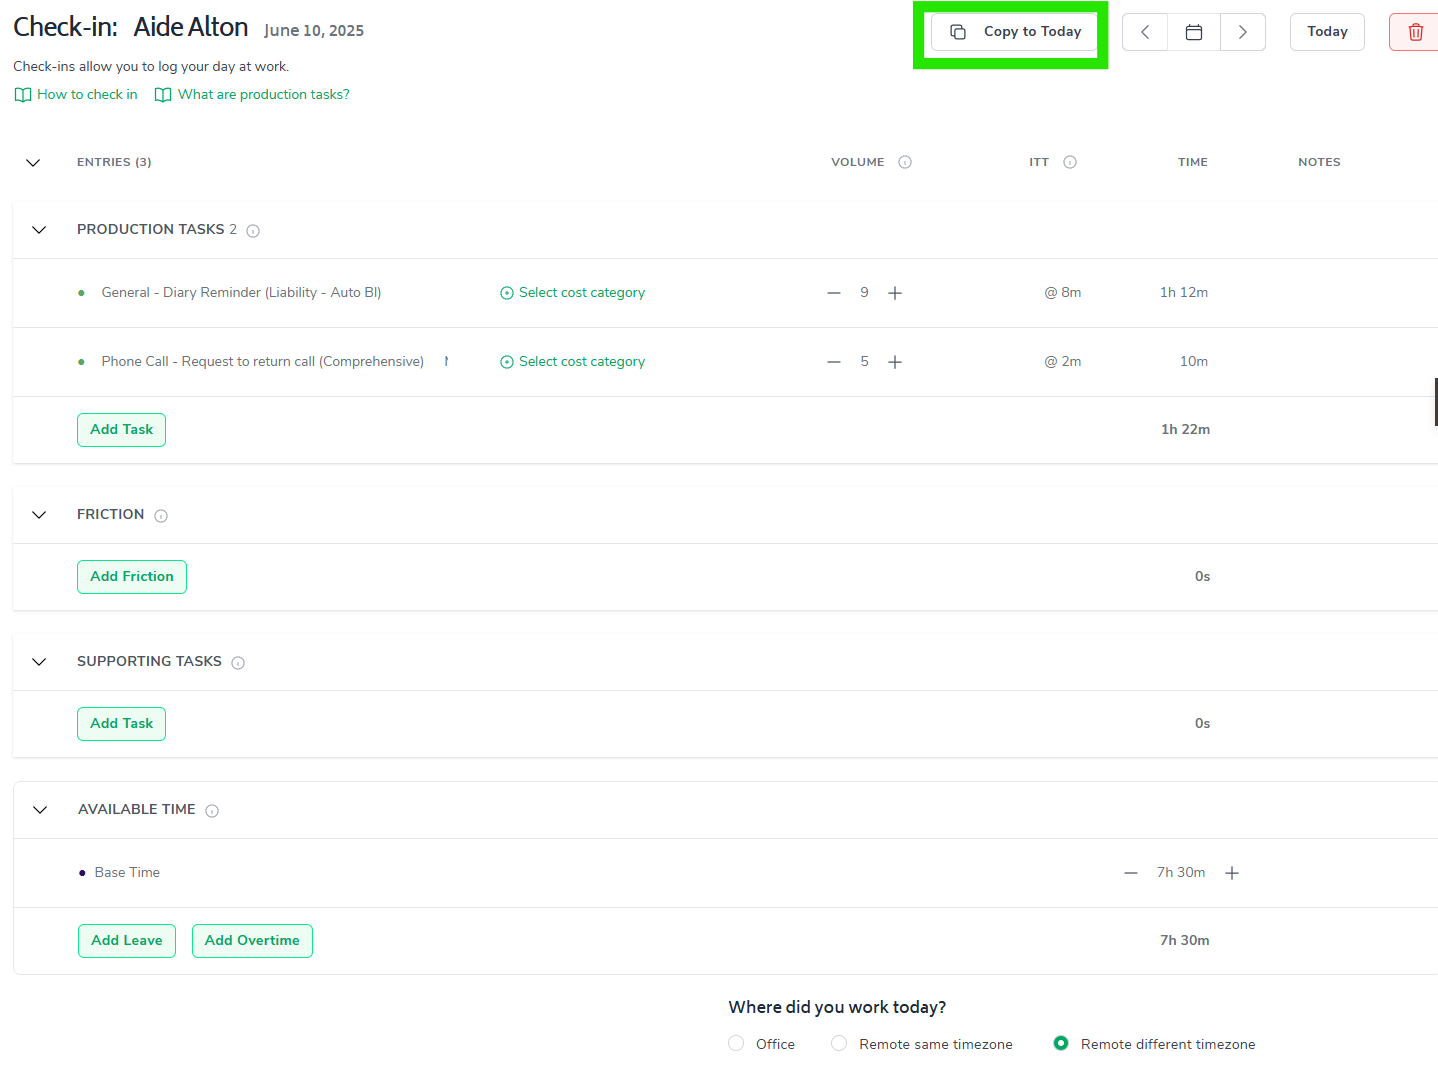
The Daily 'Check-In' screen allows personnel at any layer of an organization to track and record both their work time and any leave for a given day, but also where they have spent their time during the course of the day.
The 'Check-In' screen is predominantly used by Individual Contributors (ICs). Depending on the organization’s strategy, Frontline Managers (FLMs) may also be required to use this screen.
The structure of the Bramble platform does allow for any personnel higher than a Frontline Manager to track where they are spending their time, however this is a rare occurrence.
There are two ways to access the 'Check-In' screen – clicking on the 'Check-In' button in the top-right of the Hub page; or selecting 'Check-In' in the navigation bar to the left of the screen.
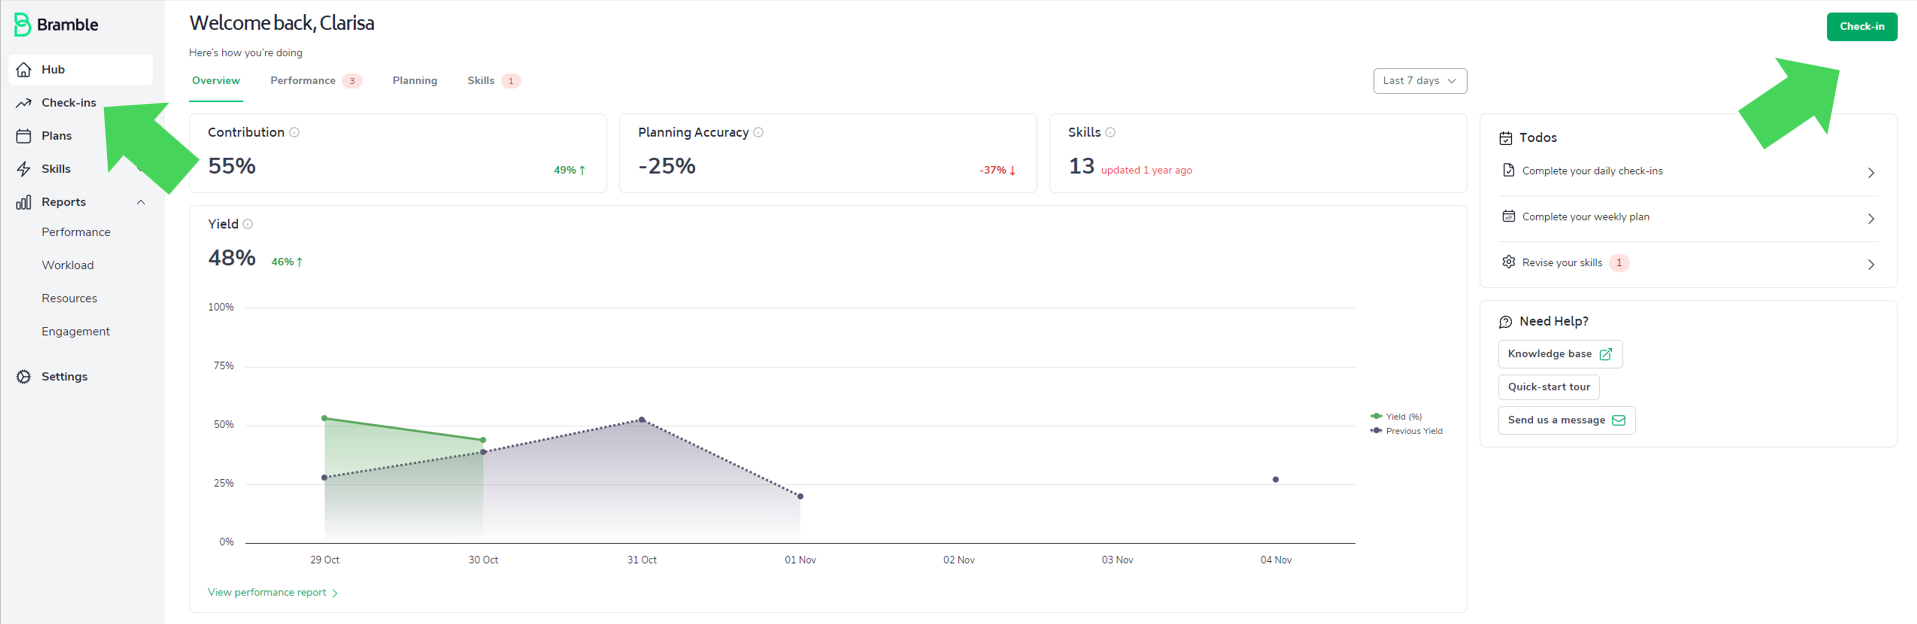
The arrows indicate the two most direct pathways to opening your Check-In screen.
Once accessed, the date at the top of the page should be displaying the current workday, based on the time zone selected in the user’s Settings > Preferences. The page is then broken up into the four sections in which information can be recorded or amended.
Production Tasks – record volumes for tasks requiring manual tracking, not time spent on those tasks. This output for each task will be derived by multiplying the volume with the Ideal Task Time (ITT). Tasks with an entry mode of 'Auto' can not be created or edited here.
Cost Category - users can choose to add a Cost Category to any production task is applicable, and the Cost Category functionality has been configured by a System Owner or Admin.
Friction – recording the approximate time spent for the day on any tasks that are not classified as either a production or supporting tasks.
Supporting Tasks – record any time spent in required meetings, training, projects, or assigned leadership type task.
Available Time – record contracted base time (i.e.. Standard workday as per employment contract), any over time worked, or time on any type of leave.
Work Location - compulsory section where users indicate the location where they worked that it most appropriate.
To add a new entry, select the ‘Add Task/Friction/Leave/Overtime’ button found in each section.

An example of adding Friction to your Check-In.
Select the item from the dropdown list, and enter either the applicable volume or time:
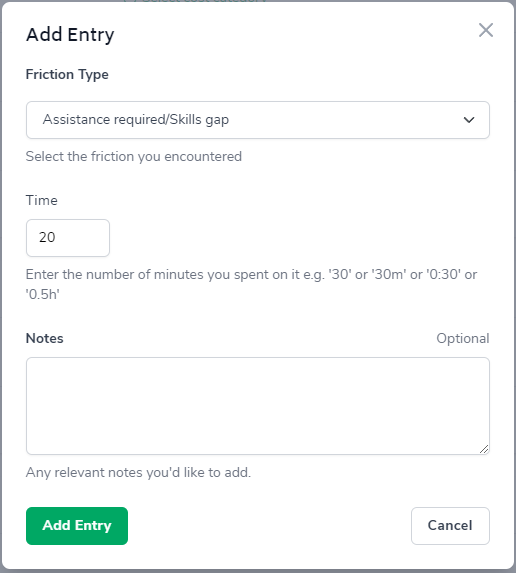
If a User wishes to add notes to any items you add to your Check-In they can (see screenshot above), however this is optional.
Once the user has completed all their entries for the day, the data will automatically be saved and the reports updated.
After the first day a user has completed the My Day screen they have the option to use the ‘Copy to Today' button going forward, allowing the them to pull through entries from any previous Check-In and simply edit the volumes/times, rather than re-entering every item each day.
Pro tip: DO NOT USE if data is being automatically imported!